Introduction
In this part of the series, we will create an external database and configure the settings for that database. We also look into the process of migrations which is to convert a model which we created in the previous part into the actual structure/schema for the database. I'll be using PostgreSQL for most of the demonstrations but it should be similar for other database management tools. This part will make your Django project link to a local database.
Selecting a Database
If you have read my previous article about models, you would have got a glimpse of the tools to manage a database, but not quite to choose a database for your project. This section covers that specifically. We will see what options you have while selecting a database.
- SQL databases
- sqlite
- PostgreSQL
- MySQL
- MariaDB
- Oracle
Selecting a database hugely depends on the type of application you are going to make, but most of the time it's SQL as a choice just because it has been dominated for a variety of application types over 4 decades. Still, NoSQL is growing in popularity and has some advantages over SQL in many modern applications. You need to analyze your project a bit deeper and understand the flow of data in a better way to make a decision about SQL and No-SQL, but most of the time it's gonna be SQL.
Also Django doesn't officially support NoSQL, so you'll have to turn up some third-party libraries to integrate and manage a database.
After deciding the type of database, you have one more decision to make here. It's picking up a DBMS tool. There are a lot of databases like PostgreSQL, MySQL, MariaDB, Oracle, etc. you need to pick whichever you feel comfortable and the one which suits your project architecture and requirements more closely. Though there might be very few differences in all the SQL Database tools there are a few things that distinguishes one from the other.
Creating a Database
To create a database, you need to go to the Admin app of the DBMS tool you are using, for Postgres it's pgAdmin, for MySQL it's MySQL Administrator or PHPMyAdmin. You need to do the research for setting up a database locally for your project. But Django already is paired with SQLite which is a relational database but with a few quirks. It is really great to get started with a project without creating or managing an entire database system. The SQLite database is all contained in a file called db.sqlite3.
If you want to work on a particular database like PostgreSQL, MySQL, etc. you need to create the database using the management tool and keep the configuration data like name, host, password, etc. after creating the database.
I'll give a demo of creating a simple database in PostgreSQL but mostly it is a bit different in other DBMS tools as each of them have their own GUI applications. Install Postgres and pgAdmin.
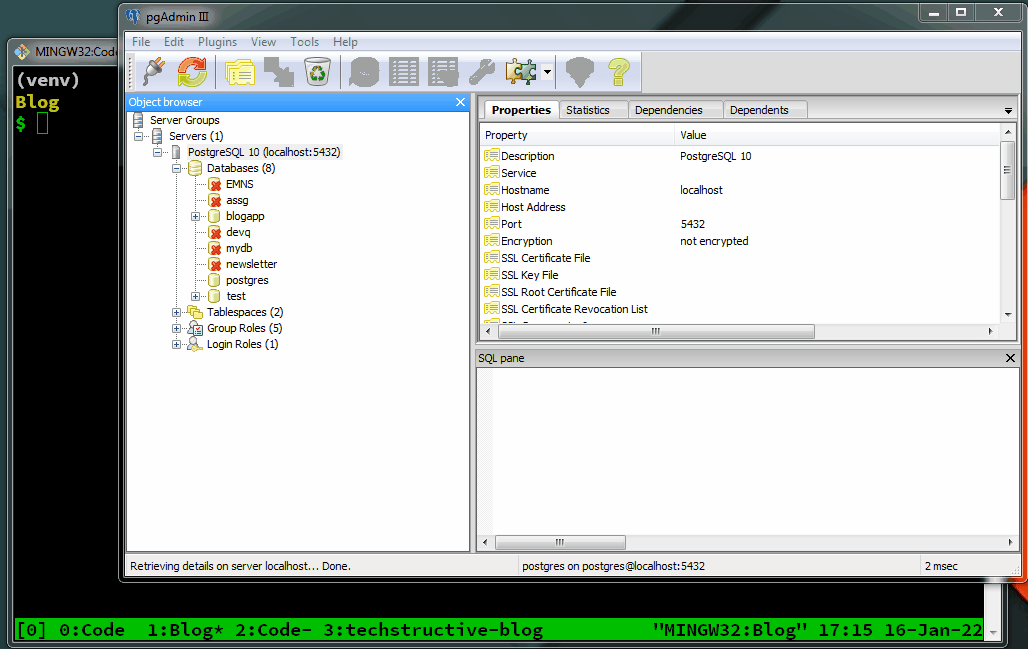
This is a demonstration of creating a database in pgAdmin -3
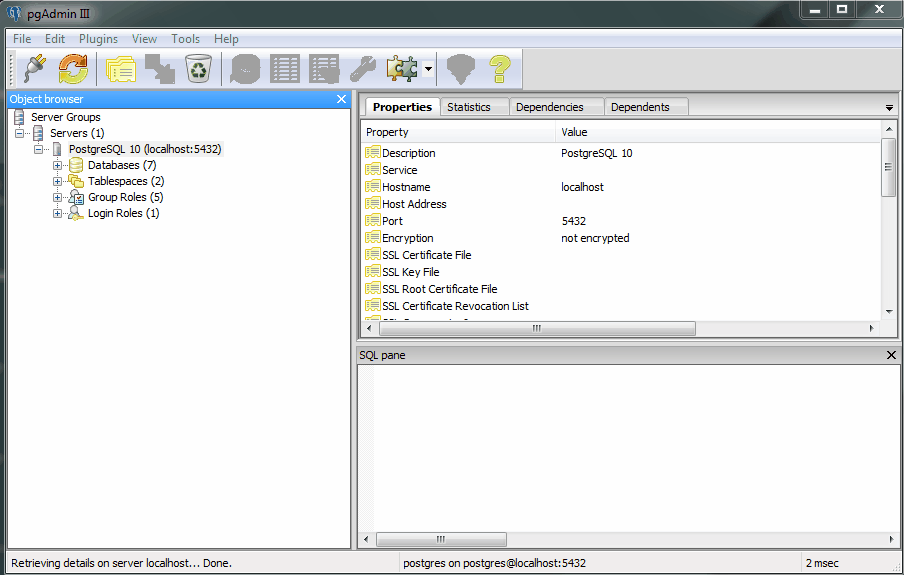
This is how you create a database in pgAdmin-3, it should be quite straightforward and simple to follow in other DBMS tools as well. You will also require a password to open the Admin interface for these tools, so keep that password handy we'll require that later.
The following is the process to create a database/schema in MySQL

This will create an empty database in your local machine. We'll want our Django project to link that particular database and use it inside its applications. In the next part, we'll configure the settings.py file to access the database from the local machine.
Configurations for Database
We need to configure the settings.py file for integrating the database in our project. Django has a dedicated section for the database in that file. By default, the database configuration is created for the SQLite database which as I said earlier it is the default database that Django uses if not specified and configured.
So, when you first see the configuration for the database in the settings.py file, you will see configuration like the following:
DATABASES = {
    'default': {
        'ENGINE': 'django.db.backends.sqlite3',
        'NAME': BASE_DIR / 'db.sqlite3',
    }
}
For PostgreSQL or any other database, we will require more things than the sqlite configuration. Namely, we will need the following:
nameof the databaseuserof the databasepasswordfor that userhostandportfor the database.
The port is optional as most of the database tools pick up the default port for their purpose. For PostgreSQL, the default port is 5432 and for MySQL is 3306. Leave it blank like 'PORT': '', if you are not sure what is the port for that database. We also need to specify the ENGINE as it is the database backend to be used for the project. There are options for specific databases as mentioned in the documentation.
PostgreSQL:
In PostgreSQL, the default user is postgres, it might depend on your configuration and setup though. The pgAdmin will prompt you for a password when first installing the Postgres on your machine. The password to be used is for the default user of the database. The name is the name that you gave while creating the database in the Postgres admin section. Finally, the host is generally localhost as we are using the local database which is our system, and port as said earlier is 5432 by default for PostgreSQL.
DATABASES = {
    'default': {
        'ENGINE': 'django.db.backends.postgresql',
        'NAME': 'blogapp',
        'USER': 'postgres',
        'PASSWORD': '12345678',
        'HOST': 'localhost',
        'PORT': '5432',
    }
}
MySQL:
For MySQL, the default user is root and the port is 3306. The password is the default password you use to access the MySQL Administrator application.
DATABASES = {
    'default': {
        'ENGINE': 'django.db.backends.mysql',
        'NAME': 'blogapp',
        'USER': 'root',
        'PASSWORD': '',
        'HOST': 'localhost',
        'PORT': '3306',
    }
}
For further details on how to configure a Database in a Django project you can check out these articles:
MongoDB is a NoSQL database so, it will be quite different to set up and configure the database at least in the longer run. I've no experience with NoSQL so please forgive me in this part. There are very rare instances you will need a NoSQL database with Django.
There are other configurations as well which might be specific for the purpose and can be explored in the django documentation.
Verify the database connection
To check if the database was actually linked in the Django project, I'll introduce you to a great tool in Django: python manage.py shell (make sure to be in the virtual environment).
This command will open a python interpreter in the shell. It is an interactive console so that we can test some aspects in our project. For instance to check if the database is connected or not:
Execute the code after running the command python manage.py shell from a virtual environment.
import django
print(django.db.connection.ensure_connection())
If this returns None you are good to go. And if the result is tons of error messages, you have something wrong in the configuration or the database itself.

Installing database adapter
Before we can do anything with the database, we need one thing which is a database adapter. Now, this is dependent on the database you are using. The list is as follows:
- psycopg2 for PostgreSQL
- mysqlclient for MySQL and MariaDB
- cx-Oracle for Oracle
SQLite does not require an adapter as the database is a file stored in the base directory as db.sqlite3
The above list is nothing but Python packages that allow the Django ORM (which is under the hood python) to operate the database. To install them you can simply install with pip as pip install psycopg2 , pip install mysqlclient, and so on. Make sure you are in a python virtual environment.
After installing the particular package, we can now move on to the migration process.
Migrating the models
Now, we have a clean and fresh instance of a database created. What next? We'll now use the logic in the previous part, where we created and designed the logic for the database i.e. Models. Now, we can combine our physical database i.e. the database we just created on a DBMS tool locally, and the logical model to populate and give it a structure.
We'll perform migration on our database.
This is where the magic happens and probably the step which should be carefully be executed if working with a real-time (production-level) database. Because the commands you'll run are gonna directly affect the database.
Making a migration is a two-step process. But what is migration?
The Django documentation states it as the version control for the database schema and takes their word for that. It is basically a folder(hidden) that stores the state of your database structure just like commits in git.
Let's see it practically
Makemigrations
For actually creating tables, relations attributes in a database from a model. We use the command makemigrations. This command creates a file inside the migrations folder inside the application folder whose model has been recently created or updated. It doesn't affect the database but it creates a file which in turn after a migrate command will be parsed to the actual database using the ORM.
So, for any attribute or logical change inside the model we use the makemigrations command as below:
python manage.py makemigrations
We do not use the above command if any functional change i.e. operations involving querying the database and other operations that don't affect how the database is structured or stored. Though we have to use the makemigrations command when the fields in the model are changed even slightly.
Migrate
To see the result or create the actual tables, attributes, and relations among the tables in the database, we need to run the command migrate which will see the latest file in the migration folder and execute the queries to change the schema of the database. So, this is a very powerful command that can perform SQL queries under the hood with python. The below demonstration shows the output of these two commands in a Postgres database.
python manage.py migrate
Demonstration
Let's follow the GIF/video in sequence:
- Create the database in the DBMS tool
- Configure
settings.pyfor the database connection - Install
psycopg2or DB-specific adapter. - Create the model.
- Run
python manage.py makemigrations - Run
python manage.py migrate(if the above command is a success)
Here's the model from the demo:
class Article(models.Model):
    title = models.CharField(max_length=255)
    post = models.TextField()
    created = models.DateTimeField(auto_now_add=True)
    updated = models.DateTimeField(auto_now=True)
If we have multiple apps and we only want Django to migrate a model from a specific app, we can simply add the name of the app to the command. By default, Django will migrate all the models from the INSTALLED_APPS list so we need to specify which app to migrate explicitly.
python manage.py makemigrations app_name
This also applies to the migrate command.
To understand the migration process more deeply, let us see another demonstration of changing the model and then applying migrations. We'll keep an eye on the migrations folder inside of the app in the project.
We can see that initially when we applied the migrations in the previous demo, there was a single migration file called 0001_initial.py but after we altered/changed the title's max_length from 255 to 127 and executed the makemigrations command another file called 0002_alter_article_title.py was created that only contained the changed field. This is very similar to git diff in which we are about to commit to the actual database.
So, that was all about migrations. There is definitely a lot to be covered about migrations and databases, but I'll leave you here for now. There are a lot of things to understand and learn before we can talk more about the databases. We now have a base for other things to get our heads around. We now have a database linked to our project, still, we don't know how to use fetch or query them. That is a topic for another part.
We didn't use SQLite database which is by default provided by Django because in production it can just listen to one request/query at a time. That is not ideal for most web applications. Still, there are use cases of this database as it is suitable for embedded database systems for storage applications in desktop/android applications.
Conclusion
So, from this part of the series, we were able to configure a database more specifically an external database (not the default SQLite DB) in a Django project. The concept of migrations was understood and demonstrated with live examples. Also, the process of creating and designing models was used from the previous part to create the structure in an actual database. In the next part, we shall dive into the Admin Section that Django provides to view and tinker with the local database. If you have any queries(not database queries) then please let me know, thank you for reading, and until then Happy Coding :)